Composting falls into 3 main categories: hot, cold, and worm (not warm). The most important factors for any type of composting are air, water and a mix of green and brown material. However each method of composting carries different benefits and requirements. I’ve highlighted the key components to each type and then discuss each method in more detail.
HOT
- Results in finished compost in as short as 1 month
- Kills undesirable seeds in pile
- Requires specific size and space (3-4 feet cubic square)
- Pile starts with layering
- Keep aeration and moisture at consistent and proper level
- Odor may be an issue if not maintained properly (too wet)
- Turn the compost 3-4 days
- Takes the most amount of care and maintenance
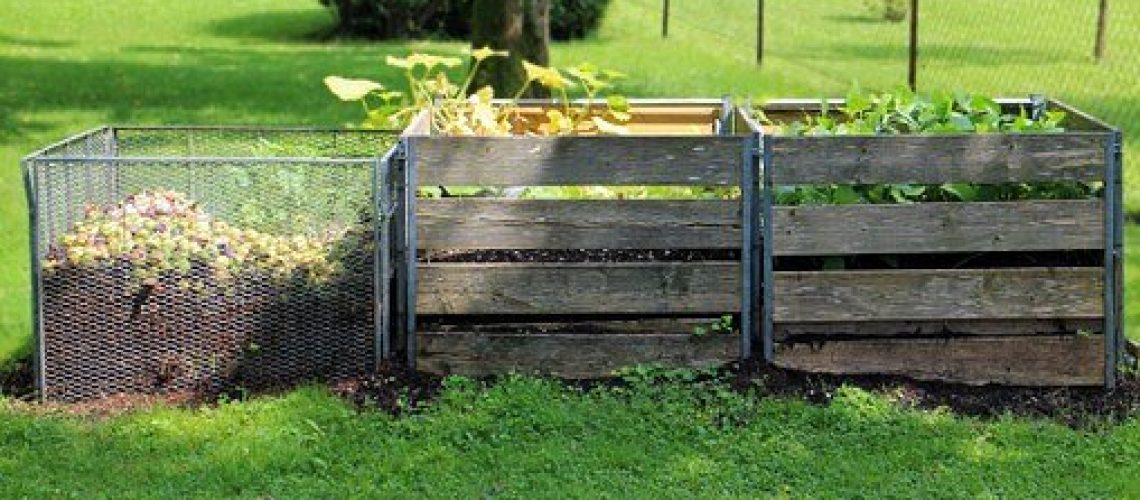
A hot compost pile requires a three to four foot cube to build heat and function. The pile is built outdoors layering a half a foot of larger brown items (for aeration), then alternating smaller browns, soil, and greens until the pile is three to four feet high. The ideal ratio of browns to green is about 30 to 1.
Aerate the pile well. Water the pile. The moisture level should be kept like that of a wrung-out sponge. Add browns to soak up excess water. A drenched pile can create an unpleasant odor. In that vein, covering a compost pile could trap too much moisture and cause anaerobic conditions, and result in a smelly situation.
A hot compost pile can reach temperatures of 120-170 degrees Fahrenheit in just a few days. The heat in the center of the pile breaks down the materials and kills unwanted seeds. Once the pile starts cooling down, turning the pile will result in increasing the heat. The rule of thumb for turning a compost tumbler is every three to four days, and an outdoor pile every three to seven days. The time in which the pile needs turning depends on factors such as the size of the pile, the ratio of greens to browns, and the moisture level. If you optimize the conditions for the pile, you can compost your organic matter in about one month.
The compost pile can be stored in the sun or the shade, although using the sun to increase the temperature can help the bacteria and fungi process the materials faster. However, the sun will dry out the pile more quickly, and requires watering more frequently.
Undoubtedly, hot composting requires attention and care to maintain the right levels of moisture, aeration, size and temperature. However, if you put in the time, this is the fastest method of producing compost, and there is the added benefit of killing undesirable seeds and pest larva.
COLD
- Takes 4-12 months but can be longer (faster in a tumbler)
- Can be done in any pot or space available
- Low effort
- Can add to the pile as it’s composting
- Keep aeration and moisture at consistent and proper level
- Odor may be an issue if not maintained properly (too wet)
- Undesirable seeds can sprout when compost is used
Cold composting requires much less effort than hot composting. In fact, it is also referred to as passive composting. Essentially you pile up your greens and browns as you accumulate them and allow them to sit until they break down. The pile should also be kept adequately aerated and moist like a wrung-out sponge. There are no size requirements for a cold compost pile; it can be large or small.
For our family of 4, this process takes about a year, sometimes longer. Our pile is located in a big planter on wheels. We only use it for materials that we cannot compost using worms, or to avoid overfeeding the worm bins. The pile does not heat up enough although we continually add to its volume. We eventually get finished compost although it is much slower in the making than hot composting or vermi-composting (using worms).
Please note there are a few factors that speed up cold composting. If you cold compost in a bin that spins, or a tumbler, the turning of the compost can speed up the decomposition process. If you compost without a bin, on the soil, composting may happen quicker if earthworms find their way into your pile. Adding some soil into your compost mixture may also help the process since the soil may contain worm eggs and bacteria to aid in the decomposition process.
WORM
- Results in finished compost in as short as 1 month
- Takes the least amount of care and maintenance
- Variety of sizes, bins, indoors and outdoors
- Odor not usually an issue (unless extremely overfed)
- Keep aeration and moisture at consistent and proper level
- Undesirable seeds can sprout when compost is used
- Pineapple, citrus, and tomatoes cannot be added
Worm composting, as the name suggests, uses worms to eat food scraps and other organic material and then excrete them into worm compost, aka vermicompost. In passing through the worm’s body, the organic material is digested and finally exits the worm’s tail end as nutritious amendments for your garden or any plants.
Captive worms live in an aerated moist environment in brown bedding and are usually fed green kitchen scraps in a percentage that does not exceed the browns in the bin. Therefore if you add greens, you add the same amount of browns. The pile should remain odorless as long as you err on the side of underfeeding. Worms can eat half their body weight in 24 hours.
Red wigglers are the most tolerant in captivity and commonly used for worm bins of various sizes around or inside the home. Earthworms do not survive well in captivity. There are ways to use earthworms to compost but it must be done by moving the bin outside and underground so that the earthworm has the freedom to move in and out of the bin.
The compost bin contents should be moist like a wrung-out sponge. If the contents are too dry, the worms can die; and if too wet, the worms can drown. When adding bedding, it is best to shred the browns. For example, we shred cardboard delivery boxes after removing all plastic and glossy stickers. Shredding increases the surface area for the microbes and worms to work on and provides a more even distribution of air and moisture among the materials.
The worm bin is easy to set up and simple to use. As long as you continually add to its content, the worms have moisture and food. The environment stays properly moist with regular addition of kitchen scraps (with the exception of acidic foods like pineapple, citrus and tomatoes) and pre-soaked cardboard.


